TM 55-1520-240-23-10
16-27
ASSEMBLE FORWARD OR AFT CARGO HOOK (AVIM)
(Continued)
16-27
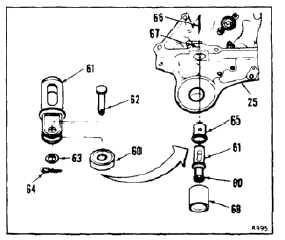
26.
Position bearings (60) in plunger (61). Install
clevis pin (62), washer (63), and cotter pin (64).
Check that bearing rotates freely, with no binding.
27.
Install bushing (65), plunger (61), and pin (66)
in rear plate (25). Seal hole (67) with adhesive
(E57). Wear gloves (E184.l).
28.
Install dust cover (68) over plunger (61) and
bushing (65). Apply Loctite 404 (E343) around
edge of dust cover. Wear gloves (E184.1).
Be careful when compressing trunnion
springs to prevent injury to personnel
or damage to equipment.
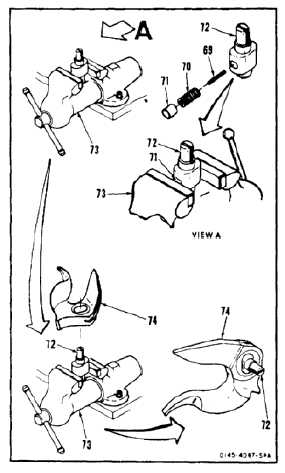
29.
Install springs (69 and 70) and plunger (71) in
trunnion shaft (72) as follows:
a.
Apply grease to springs (69 and 70) and
plunger (71). Use grease (E190).
b.
Install springs (69 and 70) and plunger (71)
in trunnion shaft (72).
c.
Install trunnion shaft (72) in vise (73), slotted
end of shaft up and vise on half of plunger
(71) as shown.
d.
Compress springs (69 and 70) and plunger
(71) into trunnion shaft (72) with vise (73).
Trunnion shaft contains spring loaded
plunger. Be careful when placing
load beam over trunnion shaft and
releasing spring tension to prevent
injury to personnel or damage to
equipment.
30.
Position load beam (74) over trunnion shaft (72).
Make sure load beam (74) covers exposed part
of plunger (71).
31.
Hold load beam (74) in position and release
trunnion shaft (72) from vise (73).
32.
Position load beam (74) upright. Tap trunnion
shaft (72) into load beam. Use soft faced
hammer.
16-145