TM 55-1520-240-23-5
6-35
REPAIR TRANSMISSION SUMP (AVIM)
(Continued)
6-35
14.
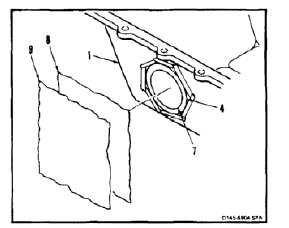
Check that repair is slightly higher than surface
of sump (1). Add more pieces of fabric under
top patch (7), if needed.
15.
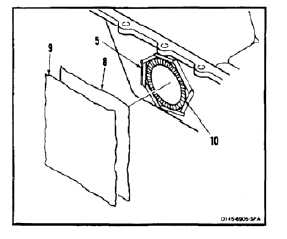
Cover repair and cleaned area (4) with
peel ply (E270) (8). Cover peel ply with
Teflon-impregnated fabric (E170) (9).
16.
Place weight on repair area to provide 2 to 3 psi
pressure. Use shot bags or equivalent.
If temperature exceeds 180ºF (80ºC),
sump can be damaged.
17.
Cure resin at 140º to 160ºF (60º to 70ºC) for
2 hours. Use infrared lamp and temperature
indicating strips (E413).
18.
Remove weight, Teflon-impregnated fabric (9)
and peel ply (8). Remove Teflon tape (5).
19.
Sand squeezeout (10) until repair area is smooth.
Use abrasive paper (E7).
Protective gloves (E184.1) shall be
worn during the remainder of this
task; otherwise, personal injury could
result.
20.
Clean the repair area with acetone (E20) and
clean cloths (E120). Wear gloves (E184.1).
21.
Sand the repair area with abrasive paper (E10).
Clean the area with acetone (E20) and clean
cloths (E120).
22.
Apply one coat of epoxy primer (E292 or E293).
Allow the primer to dry.
23.
If the sump is from a forward or aft transmission,
apply two coats of epoxy coating (E166). Allow
the coating to dry.
24.
If the sump is from a combining transmission,
finish the repair area with two coats of black
lacquer (E462) or polyurethane (E285.1), as
determined by the following:
a.
Apply methyl-ethyl-ketone (MEK) (E244) to a
small area of the topcoat near the area to be
refinished. Use brush (E86).
b.
Wipe the area. If the topcoat wipes away, use
lacquer (E462). If the topcoat is unaffected,
use polyurethane (E285.1).
INSPECT
FOLLOW-ON MAINTENANCE:
None
END OF TASK
6-115


