TM 55-1520-240-23-4
5-23.1
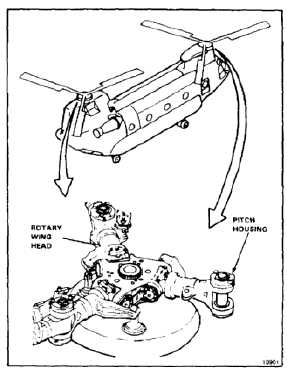
REMOVE ROTARY-WING HEAD TIE-BAR ASSEMBLY
5-23.1
INITIAL SETUP
Applicable Configurations:
All
Tools:
Powertrain Repairer’s Tool Kit, NSN
5180-00-323-5267
Container, 2 Quart
Bolt, 3/8-24 Thread X 5 Inches
Drift, Phenolic, 3/8 Inch Dia.
Materials:
Tags (E264)
Personnel Required:
Aircraft Powertrain Repairer (2)
Equipment Condition:
Battery Disconnected (Task 1-39)
Electrical Power Off
Hydraulic Power Off
One Forward and One Aft Rotary-Wing Blade Tied
Down (Task 1-26)
Work Platform Open (Task 2-2)
Rotary-Wing Blade Removed (Task 5-64)
Hub Oil Tank Removed (Task 5-15)
NOTE
Procedure is same to remove any
tie-bar assembly. Removal of tie-bar
assembly from forward rotary-wing
head is shown here.
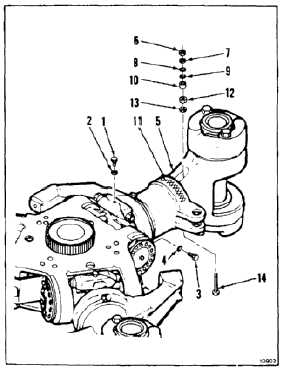
1.
Remove lockwire from filler plug (1). Remove
plug and packing (2).
2.
Remove lockwire from lower plug (3). Remove
plug and packing (4).
3.
Drain oil. Use container and cloth (E120). Raise
pitch housing (5).
NOTE
Red pitch housing does not have
weights.
4.
Remove nut (6), washer (7), and balance weights
(8, 9, and 10) from pitch housing (5).
5.
Tie weights (8, 9, and 10) together and tag
(E264). Mark tag with color of tape (11) on
housing (5).
6.
Remove nut (12), washer (13), and bolt (14) from
housing (5). Pry washer loose from sealant.
5-118