TM 55-1520-240-23-1
1-15
REPLACE LOCKED-IN STUD (AVIM)
(Continued)
1-15
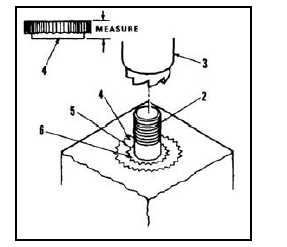
3.
Measure and record thickness of replacement
lock ring (4).
4.
Position removal tool (3) over stud (2) and
against lock ring (4).
Do not operate removal tool above
700 rpm. Make sure tool is against
lock ring before operating. Otherwise,
personal injury could result. If 700
rpm drill is not available, go to step 9.
NOTE
Interlock area need not be cut away
to full depth. Three-quarters depth
is enough.
5.
Cutaway interlock area (5) between stud flange
(6) and lock ring (4) with tool (3). Do not drill
deeper than lock ring thickness recorded in step
3. Use several light cuts. Pull back tool between
cuts to clear chips and check depth.
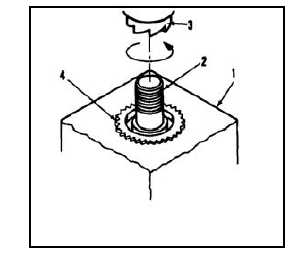
6.
Turn and remove stud (2) and remaining part of
lock ring (4) from housing (1). Use plier wrench.
NOTE
As stud comes out, it will lift out
remaining lock ring. If it does not,
use punch to collapse and remove
remaining part of ring.
7.
Remove tool (3) from drill or drill press.
8.
Go to step 15.
1-23