TM 55-1520-240-23-9
11-202
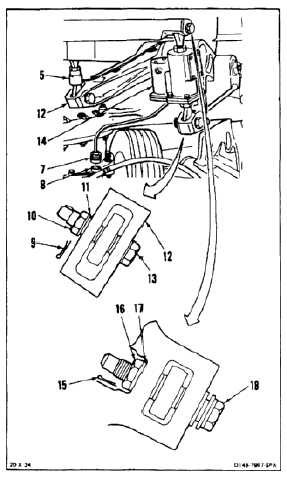
REMOVE FORWARD ACTUATOR
(Continued)
11-202
2.
Disconnect actuator connector (7) from
receptacle (8).
3.
Remove cotter pin (9), nut (10), and washer (11).
4.
Support yoke (12) and remove bolt (13) attaching
actuator (14) to yoke.
5.
Hold connecting link (5) and gently lower yoke
(12).
6.
Remove cotter pin (15), nut (16), and washer
(17).
7.
Hold actuator (14) and remove bolt (18).
8.
Remove actuator (14).
9.
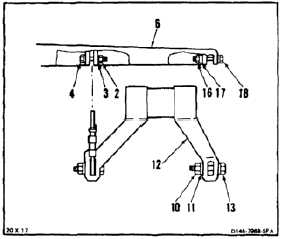
Install bolts (4, 18, 13), washers (3, 17, 11), and
nuts (2, 16, 10) in swashplate (6) and yoke (12).
Do not torque nuts.
FOLLOW-ON MAINTENANCE:
None
END OF TASK
11-809


