TM 55-1520-240-23-4
5-23.2
INSTALL ROTARY-WING HEAD TIE-BAR ASSEMBLY (Continued)
5-23.2
NOTE
Procedure is same to install any
tie-bar assembly. Installation of tie-bar
assembly in forward rotary-wing head
is shown here.
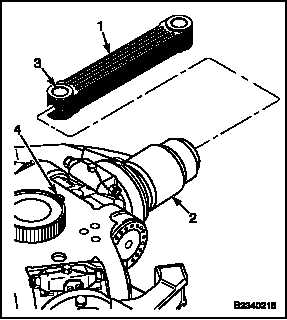
1.
Slide tie-bar (1) into shaft (2). Align hole (3) in
tie-bar with hole (4) in shaft.
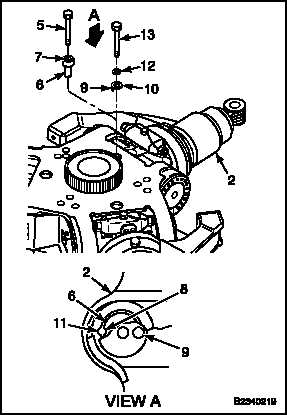
2.
Install 3/8 inch 24 thread x 5 inch bolt (5) in
pin (6).
3.
Apply light coat of compound (E75) to pin (6).
Wear gloves (E186).
CAUTION
Do not misalign tie-bar pin during
installation. Rotary-wing head will
be damaged at maximum flap angle.
Nut plate at pitch shaft will also be
damaged.
4.
Position pin (6) with slot (7) in pin aligned with
slot (8) in shaft (2). Install pin.
5.
Remove bolt (5) from pin (6).
6.
Align pins (9) of retaining washer (10) with slots
(11) of pin (6). Install washer.
CAUTION
Do not use substitute bolt or washer.
Damage to hub can result.
7.
Install washer (12) and bolt (13) in shaft (2).
Torque bolt to 40 inch-pounds. Lockwire bolt to
washer (10).
8.
Apply sealant (E63.1) to washer (10) and shaft
(2).
INSPECT
5-126