TM 55-1520-240-23-3
4-90
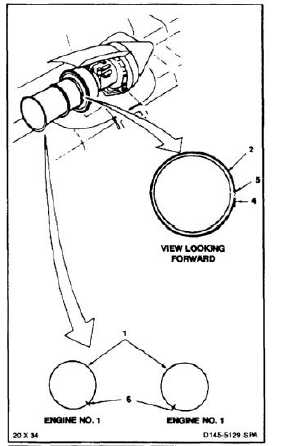
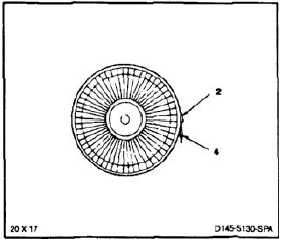
INSTALL EXHAUST CONE
(Continued)
4-90
2.
Align nut (4) on coupling (2). Engage latch (5).
Tighten nut until cone (1) is secure. Have helper
tap around coupling with rawhide mallet while
nut is tightened to make sure coupling seats
properly. For the No. 1 and No. 2 engine, align
coupling nut at the 3 and 9 o’clock positions.
3.
Align seam (6) on cone (1) as follows:
a.
On No. 1 engine, rotate cone until seam is
at 4 o’clock position.
b.
On No. 2 engine, rotate cone until seam is
at 8 o’clock position.
4.
Torque nut (4) to 30 inch-pounds above
friction-torque. Tap completely around coupling
(2) with rawhide mallet. Make sure coupling is
properly seated.
INSPECT
FOLLOW-ON MAINTENANCE:
Close engine access cover (Task 4-50).
Close engine work platform (Task 2-2).
Torque nut to 30 inch-pounds above friction torque
after initial ground run.
END OF TASK
4-346