TM 55-1520-240-23-4
5-98
REPAIR PITCH LINK
(Continued)
5-98
Do not hold rod-end at opposite end of
pitch link when checknut is tightened.
Do not turn upper checknut clockwise
or lower checknut counterclockwise
to tighten. Damage to pitch link can
occur.
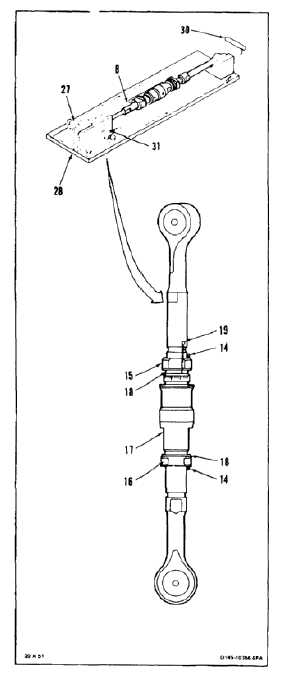
11.
Torque upper and lower checknuts (15 and 16)
to 1050 to 1300 inch-pounds.
12.
Install cotter pins (14). Keep split ends within
outside of indicator sleeves (18) to avoid boot
damage.
13.
Lockwire turnbuckle (17) to hole in pin (19). Use
lockwire (E231).
14.
Remove pitch link (8) from assembly fixture (T78)
(25) as follows:
a.
Remove pins (30 and 31).
b.
Loosen handknob (27). Move sliding angle
(28) clear.
c.
Remove pitch link (8).
INSPECT
FOLLOW-ON MAINTENANCE:
None
END OF TASK
5-599